Ok, so in my last post, I wrote about making a video recording quadcopter using an 808 #16 keychain camera and a cheap toy quadcopter, the WLtoys v929. Quadcopter recording is great. I have had many adventures recording at places ranging from my local woods, to Donnington Race track in the UK.
Anyway, my point being, once I had the flying bug, that is, once I learned not to crash anymore, I wanted to hack what I had, more. I learned that the 808 #16 camera allows video-out through it's usb port, and by mashing together a simple transmitter and receiver I could send and receive video to a screen. So, in effect I could fly FPV (first person view). It works great and I feel like I have experienced what it is like to fly, and learn-to-fly an aircraft. It's a strange feeling flying something that is out of sight, and it takes calm nerves and trust of your gadget creation skills. Things you need to know are, the quadcopter and controller use the 2.4ghz radio band which is the same as wifi. This means, parts are readily available and cheap. The video uses 5.8ghz radio band. The two bands are not the same as each other to help prevent cross frequency interference. Long-range radio frequencies are lower frequencies, i.e 1.3ghz, 900mhz. However, we will be using less expensive, higher frequency gear, and improve them with better antennas. We have a limited weight allowance with which to load the quadcopter before it becomes unable to take off, so we have to be very lean with materials. I estimate the lift allowance to be around 25-27grammes. What you will have at the end of this project is an fpv-ready quadcopter that will have greater range than the 'cheap' sub £250 quadcopters, and with better video quality, HD recording, cheap replaceable parts if broken, and modular parts that can be used on other gear (planes, cars, bird nest monitoring, etc). I figure that getting an fpv quadcopter, including controller, batteries and go-pro camera will cost about a grand. Ours will cost about a hundred pounds.
So here's a run down on the parts:
-3S 11.1v 3800mah lipo to power the monitor (secondhand but pristine condition = £6). Although the 2s 1300mah lipo powered the monitor perfectly fine for an hour as I timed it. So the 3800mah 3s is plenty.
- RC305 RX again from ebay = £15
- 2s 7.2v 1300mah lipo for the RC305 = £5
- Both of these have been attached to the back of the monitor using velcro sticky strip (£1 per metre)
- I trimmed all cables as short as I wished on the monitor, and the RC305 cable lost it's 2 audio cables, leaving only video.
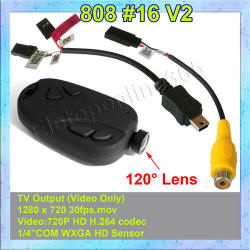
- Camera 808 #16 wide angle from ebay = £28
- hacked up an old mini usb cable to get the plug and used only pin 2. I used this for video out instead of trying to solder a single wire to the camera board pin 2. As this seemed too fiddly at present. And I want to use the 808 camera as bike mount and hat mount cam, so I wish not to butcher it.
- TX5823 200mw 5.8ghx module from ebay = £15
- Tx uses a N4001 diode to reduce the 3.7-4.2v of the lipo, to 3.3v that the TX requires - preventing it from burning out.
- RG316 pigtail with RPSMA connectors. Hacked this up to make an antenna, soldered outer shield cable to ground, centre cable to antenna. Have enough left over for several cloverleaf/helical antennas in future. = £2
- Using tiny 3.7v 1s lipo that I use for both the 808 camera & Tx. ebay = 3pack £2.50
- the tx, lipo, 808 all use a combination of micro jst connectors that I bought (male & female 10xpack) on ebay for £1.50 - not the normal red jst connectors. I want to use this at present so I can easily change the lipo if it runs out, and use the tx module on another RC vehicle, or use a cheap 520tvl camera later on if I wish.
There has been lots of trimming & soldering wires as short as they can go, trimming and soldering coaxial is a chore.
Battery charging - I'm using the v929 1s charger for the 1s lipo, and cheap B3 balance charger for 2s & 3s Lipos (ebay £4)
Price rundown (What I paid):
monitor = £12
3s lipo = £6
2s lipo = £5
RC305 Rx = £15
Velcro strip = £1
808 #16 camera = £28
TX5823 = £15
5x N4001 diodes = £1
RG316 pigtail = £2
1s 3.7v lipo x3 = £2.50
micro jst connectors = £1.50
Balance charger = £4
V929 quadcopter & 2.4ghz controller = £26
Total = £119
Early build stages:
setting up the transmitter, soldering & glueing the transmitter, building a tiny antenna...
Early mounting idea (note transmitter has not got the finished antenna yet)
Added a Diode to reduce the battery voltage slightly to prevent the transmitter from burning out.
Built a tiny circularly-polarized antenna for the transmitter, which enables 360 degree coverage, and much less static & dropout. I used
this wire.
figured out the best way to mount the monitor to the controller as best as I could. I used some old single-ply wood from the shed, and cut it up. Nothing too fancy, wanted to keep it ghetto. Used some old foam board as a sunlight hood - attached with velcro.
Painted the monitor hood black, and sealed out any light from creeping in and affecting image quality using black vinyl tape. Damn sunlight...
I tested the video range using the scientific method of placing the quadcopter on a tree stump and walking as far as I could with the monitor/controller, before the video picture signal dropped out. I managed fairly well on first try. Better to know the limits before launching :)
Eventually, after several cheaply repaired crashes, I learned to fly using only the monitor, which is a weird feeling, and can cause panic at first. This was my practice loop which I have now mastered, and I'm flying over trees and buildings without worrying too much...
I eventually taught myself to build a helical antenna using the base of a pringles can, some copper wire, a piece of scrap/leftover plywood, and some solder and hotglue. Range almost doubled. I am guessing, but I think I get about 600m radius. Might have to walk the range test again....
I added some push switches, as I was finding it stresssful to get setup by fiddling with wires and plugs, and then attempting to take off. It worked, because I lowered my stress levels resulting in fewer crashes, and I was able to manage listening to my girlfriend calling me a loser and to get a life while flying. heheh.
I hacked open the cheap controller, and desoldered the crappy antenna inside there. I added RG316 cable with an already soldered plug on the end. This allowed me to use a more powerful antenna.
Like this black rectangular wifi antenna.
So, now I am happy that I am actually flying. I can improve the quadcopter handling by swapping the 808 #16 camera with a small security-style spy camera module which uses 3.7v weighing 2grammes. This can reduce weight load by a massive 15grammes, allowing a slightly larger transmitter battery to be used, or possibly an OSD module like below.
I am also aware that WlToys have released a more 'balanced' quadcopter called the v212. Which, has an accelerometer as well as the gyroscope to assist in levelling during flight, preventing wind from blowing it over, and correcting errors. I even hear you can throw it in the air and it will correct itself ready to fly. Also, this week WlToys have released the v262, a larger quadcopter that seems to allow up to 100grammes of lift. This would allow you to use a mini fpv camera that we made with the 2gram camera, and also the 808 #16 camera to record video, from different angles such as, from the rear of the quad. That might leave more weight allowance for experiments with a mini servo gimbal rig for the 808 camera.
Progression on this project could be to hack the quadcopter circuit board, and add a digital compass and barometer like they have in mobile phones running 3.7v. This could mean you can then measure altitude and direction, and possible make a switch to hold altitude, and set heading.
Once the above has been achieved,you could also integrate a small 3.7v OSD (onscreen display):
Which could show you flight time/voltage left, altitude, gyroscopic yaw, compass measurements etc..
Another possibility, could be to attach a
RaspberryPi tiny computer to the back of the monitor, and program an Augmented Reality game that could blast aliens, shoot balloons, or fly through rings.
Now wouldn't that be fun?
And you will have made it all yourself :)
Thanks and feel free to donate a dollar: