Business is improving for me, and I recently got a pair of ready-made fpv goggles and thought I would make a review and comparison to see how things have changed.
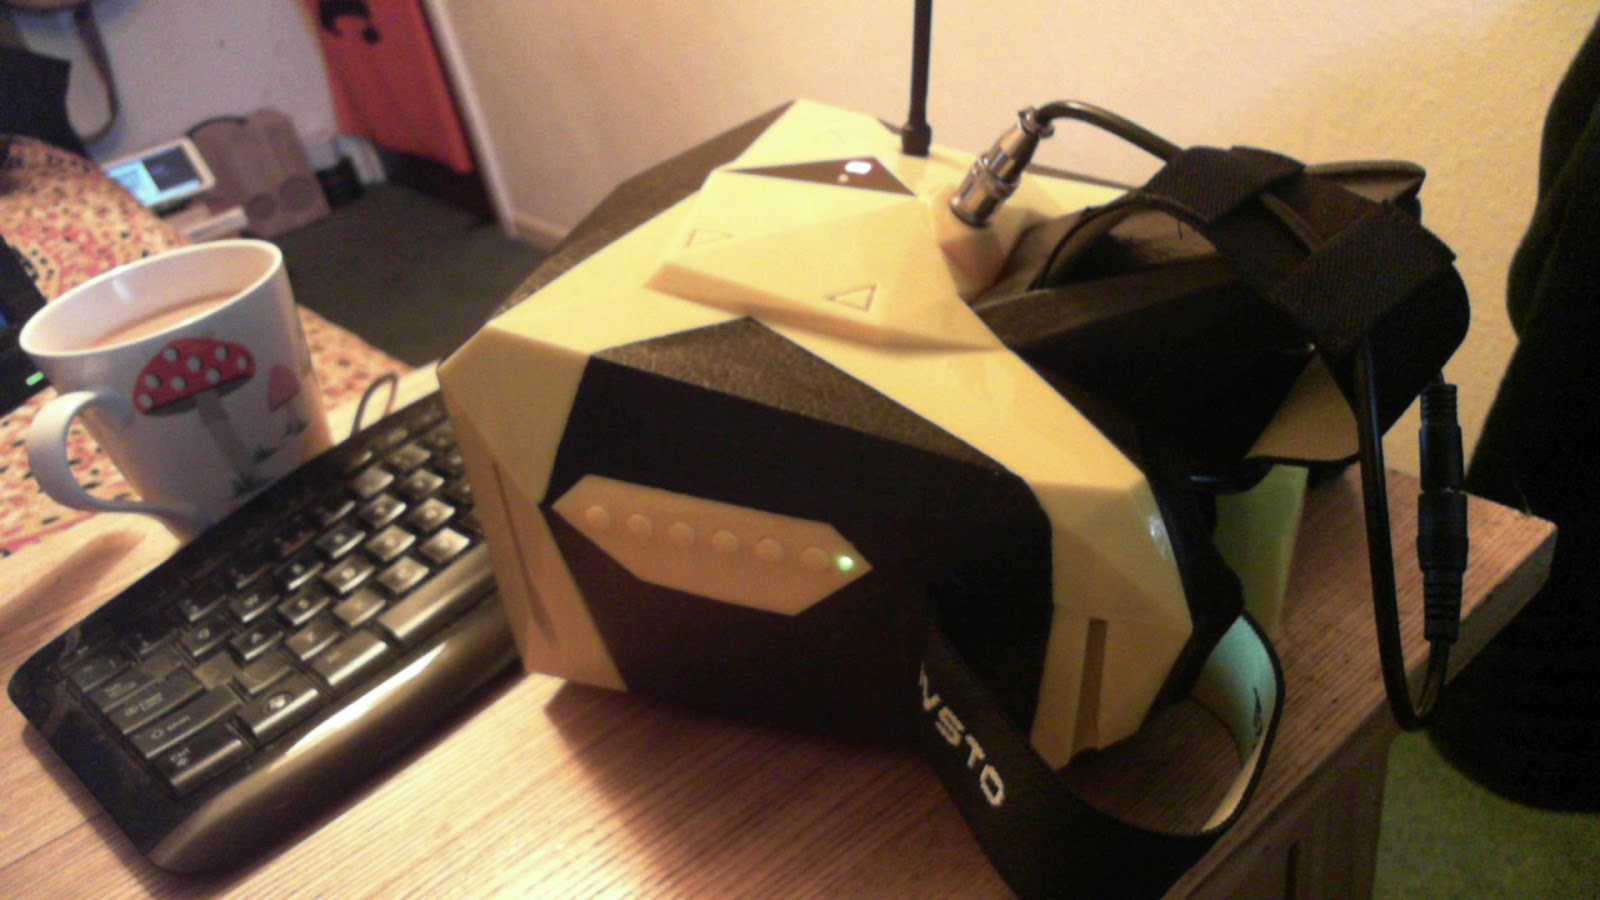
The goggles I have now, are by a company called Tovsto who were displaying products at this years CES 2016 show and appear to be quite similar to Headplay HD goggles.
I got them from Gearbest at this link after reading about the various types of goggle on the market and trying to find a good deal to suit my needs. I looked at all the usual locations and found that these were currently on discount so click... checkout.
For the last couple of years I have mostly been flying using a monitor mounted directly to my transmitter
this has proven a general success for me, as I have had zero crashes and always have been able to use the data displayed to locate and recover if I get lost in unfamiliar territory. I like that I can glance up at the sky if I need to check my orientation. orientation helps buckets, when flying via a monitor, which is why we also tend to use OSD data when flying to help us know where we are, how far/high we are, and how to get home.
(My view from the TOVSTO goggles)
What I see when i'm flying, i'm usually concentrating on the digits and arrows more than the sky or trees as once you're up high in the air there's nothing to crash into - you're completely free to roam. The rate of Altitude increase/decrease is deathly important, direction to home arrow helps when lost.
Once I had the grasp of flying using a monitor, I decided like most DIYers, to see if I can craft a set of goggles using some cardboard, a fresnel lens and a strap. It worked for the most part. It blocked out most of the sunlight and gave me a more 'closed' viewing environment. They were a bit front-heavy and would droop down my face a bit, but for practically no money, they were fun.
(DIY and Product)
So, "how do they compare to a purchased pair?"
This is a common question, and up until now I have not really been in a position to compare or answer this as appropriately as I would have liked. But now I can, and well, how do they compare?
Image would be a good beginning point. Here is a side by side:
On the left is my monitor, on the right the goggles
Here's a closer comparison of image quality
left is monitor, right is goggles
What is my subjective opinion on the image? It appears to be similar at first. This is because of the resolution limits of transmitting old-school analogue/composite video over 5.8ghz transmitters. A 5.8ghz transmitter will transmit to both monitors the same picture regardless of pixel ratio of the screens, and it will appear very similar.
The advantage of the goggles are that they block out all light, eliminating sun reflections on the monitor screen. We all know how hard it is to view our smartphone out during a sunny day, it's almost impossible to read articles. By covering or blocking out the sun using goggles we can see much more clearly, we just look a bit silly when doing so...I mean look at this guy:
we only have to search silly man with fpv goggles to see how and why we as men should not really be allowed to walk the streets after dark.
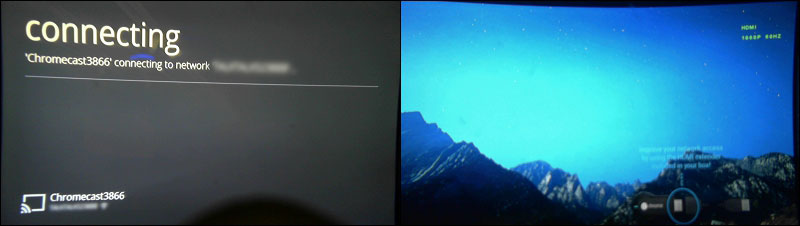
The nice thing about the Tovsto goggles are that they do actually broadcast 1080p 60hz using the HDMI port on the top. I thought what better way to test this out than to plug in my Chromecast and see if I can stream porn youtube videos through them. It appears that after a little cutting I could connect a mini-to-full hdmi adapter I have from a Raspberry pi zero, and plug in the chromecast quite easily
Once connected, I am able to see that the monitor has switched to HDMI 1080p 60Hz mode
(See, it says so in green in the corner)
The chromecast boots up
The picture is lovely, to choose a word. It is bright, crisp, clear, pleasant to view, and there is hardly any pixelation. God bless HDMI. This 1080p would work well with DJI Lightbridge or Connex HD systems, or even my up-and-coming DIY digital HD system!
Here is a piece of footage to show the video chromecast shenanigans
Works for me fappityfapfapfap...
Anyway, so how do the goggles perform as FPV goggles? Well, here is some more video footage showing as best I can, obviously, I can't fly around with a camera stuck inside there it would be tomfoolery. But here is my best test so far
For flight footage I need to think about how I can get footage. I have a DVR I could hook up but the DVR only records 640x320 pixels. I might try flying with the monitor and have someone hold a camera inside the goggles for me, bear with me one that footage, I'll plan it and make some magic happen.
So what do I like about these goggs?
- I like the image quality over HDMI
- I like the lightweight setup
- I like the quality of the mushroom antenna, it bends nicely
- I like neat storage bag that comes with them, it will help me to keep them clean and free from dust and scratches
- I like that the channel selecting is automatic. The goggles auto search when powered on, you also have a small press button which will search for signal
- I also like that these goggles have an inbuilt speaker which produces static when the receiver video fades out to static (they avoid blue screening). This is a nice audible warning for me, I do wish fpv systems incorporated audio more as I think hearing your quad or plane helps you know how the motors are responding and this helps you fly more accurately on the whole. I have a 5.8ghz transmitter with audio so perhaps I will test this out on these goggles.
What do I think could be improved upon? after all, nothing is perfection right? Well, I think the HDMI slot on the goggles could be more accommodating, it's a bit small. It is a mini hdmi port, but to fit an adapter in there you have to snip some of the foam. It's a simple solution and doesn't cause damage. I would also like to see a headphone jack. I'm sure this is an easy DIY addition, but I would have liked to see it installed already.
Also, I would like to see the goggles have an included adapter to allow a user to connect a standard 2s lipo, and lipo alarm. The included battery is an enclosed unit that simply warms the user, then shuts off the monitor - I have no idea what the voltage of this battery was/is when it shutdown. the charger is a 8.4v 1 amp wall adapter with charge on/off light.
If I am attaching a lipo battery to the back of my head I want to know that it is safe, and charged correctly or I might end up Tyler Durden 'end scene':
But I hope not.
I do think the TOVSTO goggles are an improvement for me and my own setup, I also think they are better value than headplay, better quality than quanum, and the single screen is better for my eyes than side-by-side cardboard goggles. I don't think single screen fpv goggles are going to compete with sbs goggles yet, the plain, simple view is beneficial to pilots and their ability to control aircraft.
For some time, I have been experimenting with the idea of 3D printing drone parts to speed up ideas, lower crash costs, and share with others to help create better, more efficient flying vehicles. I experimented with using 16mm Carbon fiber tubing to help reduce printing times and to improve rigidity, lower weight, and improve design.
Here's one example of motor mounts I designed. One of the key important factors for 3D prints is to ensure you have a print-friendly design. I think it's quite a good start for 920kv motor mounting.
Today, 3DR's Chris Anderson decided to release for open-source, his design files for the 3DR Iris drone
It seems 3DR are letting the Iris+ be free, to the public now that they are concentrating upon developing the Solo drone.
This is good news for hobby developers as it gives us a chance to tinker with the design and modify if we wish to. We can now print our own arms, legs, body shells, and frame plates. I'm even considering shrinking it down to a smaller size, something like a 250 size iris would be cool just to send it buzzing on auto-missions.
Anyhow, for me, the full-size iris is a little too big for my printer to handle. So I got to thinking about ways to make it consumer printer friendly.
I decided to chop the arm into two parts - the motor mount, and the frame mount. In between I figure I could use 16mm carbon tubing
Seems to print just fine, I didn't need to use support material to get a good print, although it would do no harm to.
Finished print, I placed a motor inside, added a leg support too.
I like this idea of reusing or redesigning a classic piece of hardware such as the Iris. I think there are some nice things to learn from it.
I think I will be adding the landing leg adapters to my more print-friendly motor mounts in the future. I will also see if it is possible to print the canopy, which would protect the flight hardware from prop-wind, dust, and sunlight. Time will tell. In the mean time I will upload the carbon-mod arms to my Thingiverse page soon, as always free for everyone to use.
It's true, they are! Imagine you are 20-something and you walk into a bar. Sometimes a girl will take an interest in you, sometimes they won't at all, sometimes the cute ones hide in the corners looking out at you like wallflowers.
Now, in this place there are many different interactions going on with many different people all are interacting in their own ways, enjoying, or not so much. Sometimes a girl will be stunningly beautiful and you drift on a cloud for a moment, seduced. You meet up with this girl, and eventually begin dating. Very quickly you realise that she's a bitch. She never cleans, never works, spends your time, spends your money trying to make it work, time and time again she fails no matter how much you invest and try to tell yourself that 'it will work'. You feel cheated, hurt, used, and lied to. It's a lot like this in the world of single-board computing (or SBCs, or Embedded systems, or SOCs). Small shiny devices full of wonder are presented to us to involve ourselves with and to learn with. Some are cheap, some are expensive, some are simple (and that's good), some are just too complicated and lacking in software & drivers. Some don't even work at all.
Here are some of the computers I have and have used
I like all of these boards, they all have their own unique purposes. The arduino uno is good if you want to just take it out of it's packet, write code and send it to the board. C++ is quite a fast learning language to use. The Pro Micro allows you to set it as a HID device which is useful for plugging into a big computer. the 32-bit boards: Pi, Hummingboard, Jetson, are useful for running Linux operating systems, and also then using that to control/read devices. Think of them as tiny, screenless laptops. For sheer processing power (Gpu & Cpu) the Jetson is top, it has good peripheral driver support too. The Pi-2 is the lightest, smallest, and cheapest. I sometimes find myself wishing for more from it though. I wish it had a mini-pcie slot, I wish it had a hdmi-in adapter for the csi port, I wish the usb ports had more voltage power. I'd pay a little bit more for these functionalities. Which leads me to the hummingboard from Israel, which does have a mini-pcie port & powered usb ports. It is a bit larger than the pi-2, and a little heavier due to the chip & heatsink, it also costs a bit more. But it is more powerful on-spec, it is a quad core with 2gb emmc (there are different replaceable options available). The Hummingboard has great potential due to what it is making available in such a small board space, it even has inbuilt wifi + bluetooth 4 (Like the forthcoming Pi 3). For me, at the moment, the hummingboard definitely requires a fully-functional linux distribution which works with all the hardware out-of-box. Ideally, a Ubuntu/Debian-type distribution, which has a decent GUI wifi & bluetooth manager, it needs all the usb ports to function smoothly, the linux software needs to utilise the gpu, hopefully by using ubuntu/debian, there will be good driver support for plugging in devices. It will come with time I am sure, and hummingboard will be a great choice once Solid-Run have figured this out and made a release. Once this is available it will be flying on my drone.
Hi, today I would like to share with you my experiments using the Nvidia Jetson TK1, used for automated vehicle computing and various other advanced small embedded computing systems. It's a more ghetto - but advanced ghetto - experiment.
The reason why I wanted to get involved with the Jetson TK1 board was to see how it compared with other small embedded devices. The obvious one is the Raspberry Pi 2, but there are others out there such as Beaglebone, Odroid and so on.
(size comparision between a Jetson TK1 & Raspberry pi 2)
They all are trying to open the door to general users and hobbyists somehow, to allow us into the world of advanced computing in a small form factor which is a perfect combination when you are attempting to attach it to a small flying object and send it up into the sky to perform various tasks. The smaller the better, the lighter the better. Powerful is also good, however cost begins to creep into the equation and for experimental drone hobbyists, cost - crash - repair factors come into play and unless we are equipped with an unlimited academic bursary fund, or sizeable parental trustfund, then you and me are going to be super careful how we invest our 60 hour -week minimum wage.
Even low entry requirement, poor research funding universities like MIT are onto the 'place a TK1 onto a drone' game:
(Look it's shiny and I'm from MIT. Fund me. Or that's how I think it goes.)
So, when I got the opportunity to take up the offer of a TK1 at the super special offer rate,
I figured that the invite is just too much of an offer to turn down. The spec sheet and observed capabilities roped me in, and I soon discovered that it is indeed the super computer of a hobbyists dreams. It has good I/O, good peripheral support and much faster general performance.
Frist time software setup was quick to perform:
1)Plug in power
2)command: cd NVIDIA-INSTALLER
3)command: sudo ./installer.sh //(installs the desktop environment)
4)command: sudo reboot
/---------------------------------------/
Ubuntu is pre-installed to the TK1's onboard 16GB fast eMMC (i think)
Some of the first things I wanted to setup included:
1)3d print a case
2)look at the mini pcie options: wifi + bt 4.0
3)look into the db9-uart port, see if it's possible to have mavproxy run through this into the APM board
4)hardware button shutdown?
5)look into an ssh app + remote keyboard/mouse app to control using my android tablet. (I would like to do away with keyboard & mouse)
1) look at available vision systems. I had a few rejection emails for dev kits, and too costly ($$$$) for me to buy as a diy tech developer, so in true DIY style it might be some kinda hack of a laser range finder, or a kinect-mod with a brighter ir-led installed. see how that goes.
2) the sata power port looks like a neat option for +5v & +12v outlet for devices. time will tell.
3)look into gpio for servo control/sweep
Dji Matrice 100 = £2799/$4200
Dji Manifold computer = £600/$800
Dji A2 Flight controller = £915/$1376
Total = £4314/$6376
Bargain?
After a day or so figuring out the TK1 over coffee, I learned:
1) Soft power button brings up Ubuntu shutdown options menu.
2) There's an Android app which enables ssh control, and also acts as a mouse & keyboard for Ubuntu. There is a guide to making it work here, however i'm currently having issues after executing 'sudo apt-get install xdotool'. console says 'unable to locate xdotool', so I have to fix that.
3)There is a way to modify the power button to shutdown on press. Here's a demonstration of an added switch and power button mod:
Here's the Pin-out:
I decided to get myself a mini pcie wifi & bt 4.0 module (Atheros AR5B225 WLAN Bluetooth 4.0 Mini PCIE WiFi Card > eBay > $2)
I also required a pair of antenna (which strangely cost more than the pcie card):
Unfortunately (or fortunately if you are a developer wanting to start from scratch) the TK1 does not have a vast array of driver handling as it arrives in the box.
So I had to install the Grinch kernel:
My board: Jetson TK1 R19 Rev 2.0 (important to check using: "sudo head -n 1 /etc/nv_tegra_release")
Therefore for my R19 version: Grinch Kernel version: 19.3.6
Amazingly, everything compiled and installed smoothly and without issue first time. Coming from an Arduino background, it is pretty similar to using a host computer with Arduino IDE > connecting the Arduino to the computer > compiling > uploading.
In the case of the TK1, it requires a host computer running linux (to use terminal commands), I used the latest Ubuntu on a (ghetto) laptop. Compiling, then installing to the TK1 is all done using USB cable & Terminal window.
It took about an hour and a half to compile and upload the Grinch code. The Grinch works well. I have my Mini Pcie WIFI + Bt 4.0 adapter working straight away. As a test, I connected & played some youtube using audio over bluetooth A2DP to a small speaker.
Future:
Anyway, I just wanted a pcie wifi device to allow me to setup and use ssh with my android device. it cost me very little, and works without issues. It was a gamble on which devices are compatible with the TK1.
Eventually I learned how to setup an SSH terminal with an android app:
For the record, I got an Android ssh + mouse + keyboard app working with the TK1. The android app is called 'Home Remote Control'.
Negative points:
- It has a nag screen to upgrade to a pro version which I.....blah.
- It seems that when TK1 is started, without a keyboard or mouse initially connected, I'm not getting the mouse cursor on screen showing up, even though I can move around, forcing me to guess, or replug/unplug the mouse which brings up the cursor and fixes the issue. Bit of a pain. Maybe fixable somehow? SSH works well.
Maybe try a different remote app in future....There's lots of them.
To use a remote app on the TK1 you have to install SSHserver & XDOtool:
Later on, I'll be upgrading again to L4T 21.3 (Grinch), but for now some discovery and exploring.
- I have a good idea to create a 3d-printed case/drone mount for the TK1 which i'll get around to making this next week or so. I hope to integrate a decent LED-Ring switch to allow me to boot/shutdown with a little bit of $swag$.
I would really like it if there are some device developers out there who would offer me test devices, right now, i'm looking at Kinect & Webcam + OpenCV, but would be pleased to get involved with Zed/Lidarlite. Any offers just get in touch. Thanks
F450 Mounting
So, then I decided to see if I could mount this on one of my F450 drone frames. With a little bit of careful planning and measurement, some 3D printing and cardboard I got something acceptable for my experiment
I mean, how much is the DJI Matrice 100 + Manifold again?
I have belief that the tk1/tx1 module is going to create a next generation of drones that are complete packages > I can see why DJI added it to their system. The TK1, i'm certain, is capable of flight control + 4g telemetry + vision system + on-the-fly image processing + more. All in one package. - a downward facing webcam to manage optical flow & precision landing, a depth camera such as zed/or a DIY 360 lidar controlling obstacle avoidance & point cloud mapping.
Some people are asking "What's the point of this?", and I guess you can say that sentence about anything and everything. The question ususally comes up by people who just don't understand or are confused about ideas. From a ghetto DIY or maker environment, imagine using the TK1 with a Kinect camera attached and mounting it onto a drone, then flying the drone around a building to collect damage and repair assessment data. Having this data in 3D without having to hire expensive cranes or time consuming and costly surveying, this would mean an advancement. Here's an example of this setup collecting 3D data:
I think 3DR would be wise to create a standalone IMU unit for the TK1, an install script for Ardupilot + 4gmetry, and the vision systems will arrive and develop separately.
My raspberry pi 2 is still waiting in the corner, booting, and refusing to load/power 4G dongle drivers. With the TK1 it is so much more trouble free, everything loads, everything installs, it has voltage power, and processing power. There are no SD card bottle necks.
Building the cover:
So now that I have got the physical model planned and organised, it is time to think about data communications and devices.
I contacted Ericsson & Huawei to help me find a Half-mini pcie 4g lte board so I can make better use of proxy communication to control APM. Fingers crossed I get some good support form these guys.
Alas, there does not appear to be any half-mini pcie 4g LTE boards on the market yet which I find unusual considering here we are in an age of being able to mount a supercomputer onto a drone in my spare room using small amounts of money. I do hope the big mobile manufacturers sort things soon.
In the meantime, I dug out my old 3.5g HSDPA+ dongle which I picked up for under $5/£3 when I was at Imbi Plaza next to Plaza Low Yat in Kuala Lumpur a few years past. I really love Imbi Plaza, it is like the dirty, rough market for poor geeks. Anything repaired, anything old-tech can be bought. Compared to the gloss and shiny-pristine gleam of Low Yat and it's high price tags, it's really a great market. I mean, here we are, in the west, getting super excited about 4G data using our phones, and back in 2011 most of Malaysia was hocking their 4G dongles on flea markets and getting ready for 5G. Anyway.
(Green for Go)
The good news is, that my 3.5G HSDPA+ dongle works with Grinch Kernel without having to install anything (wvdial, ppp, qt) to Ubuntu. It already has a neat setup wizard.
Now, I need to read up on enabling UDP over 3G/3.5G/4G, sending webcam video to the New Droidplanner app via gstreamer, installing and configuring mavproxy.
It's all really interesting anyhow.
Next up is to connect a camera.
Most people let's face it, don't get this far. To mount a companion computer onto a drone that you made yourself is a stretch. We generally are happy to pootle around the sky, content in our minds.
However, if you have any interest in mounting a companion computer, in this case the Nvidia Jetson TK1, Then here I would like to show to you how to get it up and running untethered and wire-free on your f450 drone.
First up we have to scrape through our scrap box for an old webcam; 720p or higher is a good idea. I have a Microsoft Lifecam Studio that I am happy with, I use it for my blog photos. What we have to do is cut all the excess wire from the usb cable to make it nice and short and light for mounting on our companion-computered-drone. I don't wish to cut the wires on my Lifecam Studio, so I took my older webcam which is an HP 720p camera that is no longer used and is just in a drawer. To trim it down we just choose a suitable length and cut with some nice sharp scissors.
We can then use some dupont connectors to join the 4 wires (Red/Vcc, Black/GND, Green & White/TX/RX). I crimped the connectors using a pair of crimping pliers that I also have. Shop around and you can find them for $10.
We also have to make a power connector for a drone lipo battery. I used an XT60 connector and connected a 3s lipo (12.6v) but you can also use a 4s if you wish because the Jetson TK1 has a voltage tolerance of 9.5-16v (16v if you are not using sata drives too, else it is 13.5v to avoid damaging the drive). The outer barrel of the power plug is the ground (GND/Black wire), the inner hole is Power (Vcc/Red wire). Confusing the two can screw up things if the TK1 does not have reverse polarity protection. I don't recommend trying to find out.
It's then a matter of sticking/fixing the camera module in a location you want and plugging it all in and booting up the Ubuntu OS. Et Voila. You have a camera-ready companion computer connected using a lipo battery, all free from ground tethers, ready to fly in the air.
You can check/view that the webcam picture is sending to the Jetson by running 'cheese' application. It should be installed already to ubuntu on the jetson if I remember correctly. There are many options to view your webcam - VLC does it too.
What next? Well, we want to set up something to run something useful for the big & powerful Jetson board don't we. So I guess using a cheap webcam, we could experiment using OpenCV for object detection
Or Caffe for 'deep learning' object identification (although the results are somewhat comical)
The algorithms are improving day-by-day and improvements are progressing, but be prepared to not have your dream results for your 'crime-policing drone' right now. We are safe from big brother for now.
For my tests, I am using a cheap webcam that didn't cost me much. You can also find a used Xbox Kinect camera these days in junk stores for under $20 (Version 1, or for better resolution Version 2 but more $$). With the Kinect we can fly around and generate 3D imaging in real-time, mapping the flight area, or creating an image to allow the drone to avoid objects upon repeat flights. Real-time will take time, as they say.
For connecting the Kinect you have to again trim the wires short using the dupont connectors, also the kinect v1 requires 12v input which you can get from the TK1's Molex port.
From these two options, the only way is up (in price). Some cameras I have seen include:
There are others out there such as Lidar modules (Lidar Lite/Velodyne), and other depth cameras with prices over $400. The velodyne Lidar has a huge price. Keep reaching for that rainbow:
(Velodyne VLP-16 --- RRP $7999)
There are suggestions that long-range (100m) Lidar modules can be made using a decent home DIY laser rangefinder, removing the module and connecting to an Arduino or Teensy board. The DIY method can be done for $20 if you buy a decent used laser rangefinder such as a bosch unit on ebay. Why use a board? It's suggested that it is better to process the range in metres using an arduino/teensy before connecting to a companion computer which will do the mapping/imaging. There is a 360-degree rotating Lidar module tutorial here.
If you want to download the 3D files I used to make the F450 mount, you can do so here:


 I do think the TOVSTO goggles are an improvement for me and my own setup, I also think they are better value than headplay, better quality than quanum, and the single screen is better for my eyes than side-by-side cardboard goggles. I don't think single screen fpv goggles are going to compete with sbs goggles yet, the plain, simple view is beneficial to pilots and their ability to control aircraft.


